Configure an Ansible testing system on Windows (Part 1)
This series of articles we will be setting up a local virtual environment for use in testing Ansible Playbooks. For our example test environment, we will start with a simple configuration of two servers. One domain controller for the CONTOSO.com domain running Windows 2012 R2 and one member server that handles simple file shares.
Prerequisites
To get started, install these tools on your workstation.
- VirtualBox (the software that creates virtual machines)
- Vagrant (the software that deploys virtual machines and runs provisioning scripts)
VirtualBox and Vagrant install like any other Windows program. Vagrant will install itself to your global path so you can run it from anywhere. No special settings are required the default setup values are fine.
This guide assumes you are working on a Windows 10 workstation with an Ansible IDE using VSCode already setup and that you have an empty workspace possibly with a local Git repository. In my examples I will be working in a Git repository cloned into C:\Source\ansible-for-windows\ initially containing no sub-folders and files. I am also assuming that the 192.168.100.0/24 network is unused and available for our test zone. Be sure to make adjustments if this network range is already in use on your network.
Vagrant Up!
The first thing we are going to need is some virtual machines to work against so for that we are going to use Vagrant to get our VMs up and running. These will be two Windows 2012 R2 hosts which I uploaded my kkolk/w2k12r2-sysprep-ready vagrant boxes as a base images for.
This is our vagrant file:
Vagrant.configure("2") do |config|
  config.vm.guest = :windows
  config.vm.communicator = "winrm"
  config.vm.boot_timeout = 600
  config.vm.graceful_halt_timeout = 600

  # Create a forwarded port mapping which allows access to a specific port
  # within the machine from a port on the host machine.
  config.vm.network :forwarded_port, guest: 3389, host: 3389, id: "msrdp", auto_correct: true
  config.vm.network :forwarded_port, guest: 5985, host: 5985, id: "winrm", auto_correct: true

  config.vm.define "dc" do |dc|
    dc.vm.box = "kkolk/w2k12r2-sysprep-ready"
    dc.vm.network "private_network", ip: "192.168.100.10"
  end
  config.vm.define "server" do |server|
    server.vm.box = "kkolk/w2k12r2-sysprep-ready"
    server.vm.network "private_network", ip: "192.168.100.11"
  end
  config.vm.provision "shell", path:"c:/source/ansible-for-windows/setup/scripts/ConfigureRemotingForAnsible.ps1"
end
Be sure the ConfigureRemoteingForAnsible.ps1 script is available on your system, it can be found in the Ansible documentation under Windows System Prep.
This vagrantfile will spin up what will become our domain controller and first member server. Vagrant will configure them so that WinRM is setup for Ansible to manage them. Create this file and save it to C:\HashiCorp\Vagrant\ansible-for-windows\Vagrantfile.
VAGRANT_HOME can be set to change the directory where Vagrant stores global state. By default, this is set to ~/.vagrant.d. The Vagrant home directory is where things such as boxes are stored, so it can actually become quite large on disk. If you'd like to change this before we create VMs use the following command in powershell:
setx VAGRANT_HOME "X:/your/path"
Open Powershell as Administrator in C:\HashiCorp\Vagrant\ansible-for-windows\Vagrantfile and execute the following command:
vagrant up
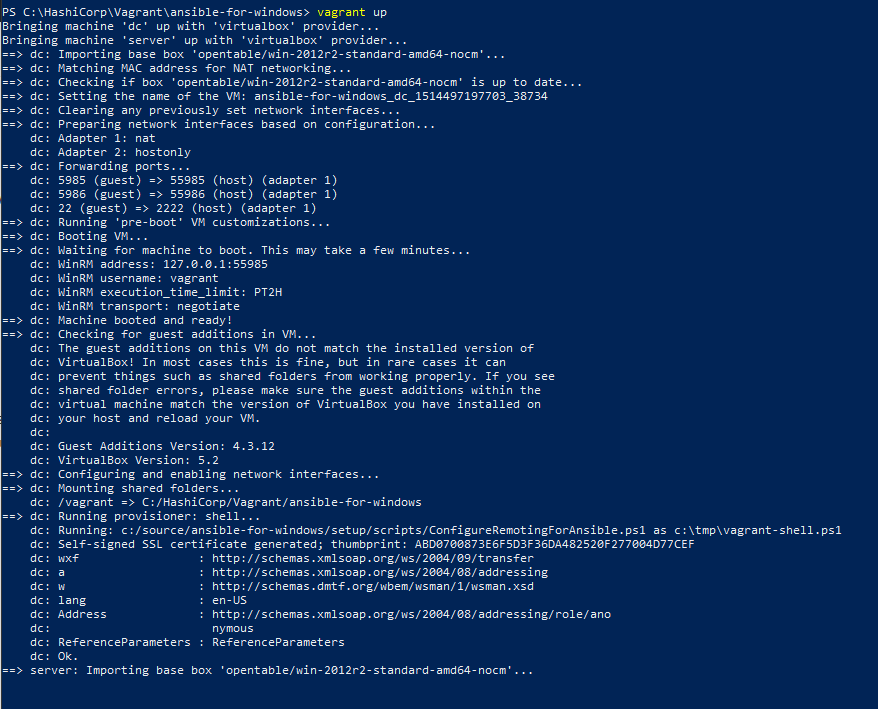
If everything goes well vagrant should configure both VMs and you should see output similar to this:
Now we're ready to get to work configuring our servers with Ansible.
Creating a new inventory
The first thing we need is a basic inventory that contains the details required to connect to the Windows Servers we are doing development and testing on. This will allow Ansible to interact with Vagrant created virtual machines for our test environment. Since this will be just a local test environment we'll use the default Vagrant username and password in the images.
Create the folder structure shown below in your workspace:
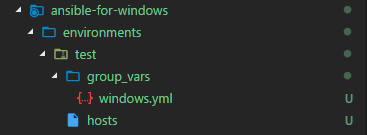
Open the hosts file and enter the following:
[windows]
[windows:children]
domain_controllers
member_servers

[domain_controllers]
dc01 ansible_host=192.168.100.10

[member_servers]
server01 ansible_host=192.168.100.11
If you made any IP Address changes to the vagrantfile, be sure to mirror them here.
Open group_vars\windows.yml and enter the following:
# Ansible user
ansible_user: vagrant

# best practice would be to encrypt this using Ansible vault
ansible_password: vagrant

# Setup some base values for connectivity to windows hosts
# Using basic authentication because we're using a local account.
ansible_winrm_transport: basic
ansible_port: 5986
ansible_connection: winrm

# The following is necessary for Python 2.7.9+ when using default WinRM self-signed certificates:
ansible_winrm_server_cert_validation: ignore
ansible -i environments/test/hosts -m setup all
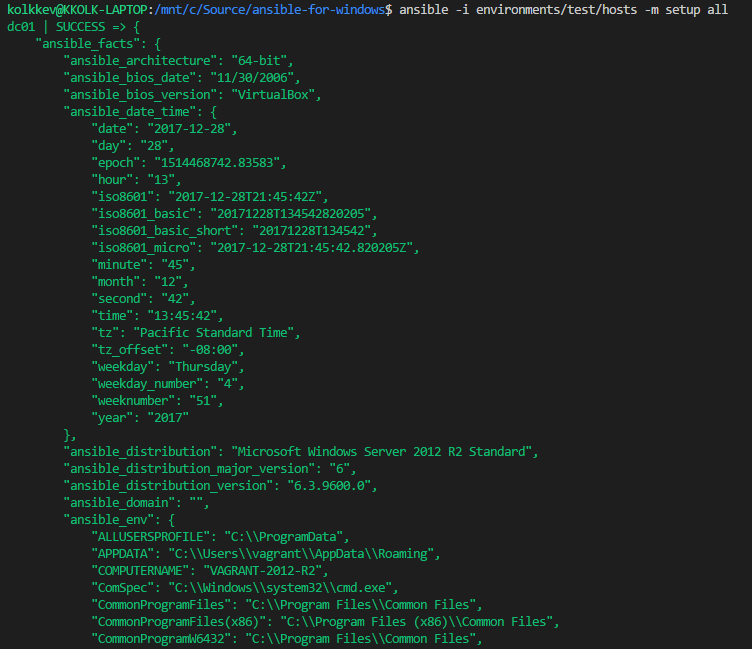
For more information on Ansible facts and the setup module see the official documentation.