Using Ansible to install a Chocolatey Package Repository
When many Windows administrators think of installing applications even very basic ones it's always... Next Next Next Finish. Ansible and configuration management tools like it don't work like this, they can't press Next. They require silent installers that run start to finish on their own. My recommendation for solving this problem on Windows is Chocolatey. It brings to Windows all the advantages of a Linux package manager like yum or apt-get and integrates well with Ansible through its win_chocolatey module that we used previously when setting up our test environment. Since Chocolatey is built on top of the NuGet infrastructure, that means we can install packages from Chocolatey.org, NuGet.org, MyGet.org, file shares, directories, custom feeds and from private feeds. In this guide, we'll be developing an Ansible role to install internal server we can use to deploy our own company-specific packages.
At a high level, we're simply going to be implementing chocolatey's installation guide as an Ansible role. So for this, we will need to accomplish the following:
- Ensure IIS is installed.
- Ensure that ASP.NET is installed.
- Disable or remove the Default website
- Install the chocolatey.server package
- Set up an app pool for Chocolatey.Server. Ensure 32-bit is enabled and the managed runtime version is v4.0(or some version of 4).
- Set up an IIS website pointed to the install location and set it to use the app pool.
- Make sure c:\tools\chocolatey.server has the following permissions:
- IIS_IUSRS - Read
- USR - Read
- IIS APPPOOL\ChocolateyServer - Read
- Make sure c:\tools\chocolatey.server\App_Data has following permissions:
- IIS_IUSRS - Modify
- IIS APPPOOL\\ChocolateyServer - Modify
When completing and testing this role, I'm going to assume that you are operating it in the CONTOSO.com Ansible test environment from my previous 3-part guide. The role as designed will operate without issue in any environment, but a few steps here when we get to testing the playbook include elements specific to that environment. For the purposes of this example, we'll be adding a chocolatey server to our existing member server - server01.
Getting Started
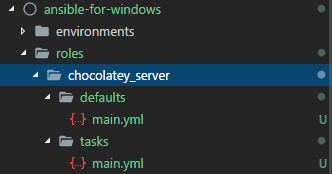
The first step in creating our new role is to create the initial folder structure; in your roles folder create the chocolatey_server folder, subfolders, and files shown below:
Now we can start working on Chocolatey.server's requirements. Open up the tasks/main.yml , we need to do is add a step to ensure IIS is installed. We can use the win_feature module to easily accomplish this:
- name: Ensure IIS is installed
  win_feature:
    name: Web-Server
    state: present
If we wanted the management tools included we can simply add a line below state: present that says:
include_management_tools: True
I'll leave it up to you if you want to include them, just so you can poke around in IIS after it's running to verify things, they are not required, however.
Next up we need ASP.NET, again we can use the win_feature module, which means we simply could create another step that calls win_feature again. We also want to have Web Application Initialization to improve site start-up performance. We could handle this by adding two more steps calling win_feature. However, this is an excellent time to make use of one of Ansible's loops. Let's modify our first step to accomplish both tasks in one go with a loop as shown:
- name: Ensure IIS Web-Server and ASP.NET are installed
  win_feature:
    name: ""
    state: present
  with_items:
    - Web-Server
    - Web-Asp-Net45
    - Web-AppInit
Now when we run this playbook later Ansible will handle each of these items separately but as part of the same overall task:

Next, we need to make sure that we have the xWebAdministration module available so that we can use Powershell Desired State Configuration (DSC) to manage IIS. Just like in our previous guide we'll use the ansible win_psmodule to verify that it's present or install it from Powershell Gallery if it's not:
- name: Ensure Powershell xWebAdministration module is available
  win_psmodule:
    name: xWebAdministration
    state: present
With that module now present let's delete the default IIS website that Microsoft includes with IIS:
- name: Ensure Default Web Site is not present
  win_dsc:
    resource_name: xWebsite
    Name: Default Web Site
    Ensure: Absent
Let's go ahead and test this role, assuming you are working off the test environment from the previous guides open up member_server.yml and add the following lines to the bottom of the file:
- name: Configure Package Management Server
hosts: chocolatey_server
tags: chocolatey

- { role: chocolatey_server }
Now we can test our new playbook simply by re-running our member_server play:
ansible-playbook member_server.yml -i environments/test/hosts
You should see the three new steps execute and make changes to the server.
Installing and Configuring Chocolatey.server
Now we're going to add steps install Chocolatey.server into C:\tools\chocolately.server\ and configure IIS to host the service. The first thing we need to do is to install the chocolatey.server package, we'll use win_chocolatey to do this. In your chocolatey_server\tasks\main.yml add this step:
- name: Chocolatey.server package is installed
  win_chocolatey:
    name: "chocolatey.server"
    state: present
Next, we need an application pool for Chocolatey.server. We can use the xWebAppPool Powershell DSC module for this which is part of the xWebAdministration module we used earlier. Using this module not only can we create the new app pool but we can ensure that it is configured to ensure that 32-bit is enabled and that the proper managed runtime version is used. Add the following task:
- name: Configure AppPool for Chocolatey.server
  win_dsc:
    resource_name: xWebAppPool
    Name: ChocolateyServer
    Ensure: present
    enable32BitAppOnWin64: true
    managedRuntimeVersion: v4.0
    startMode: AlwaysRunning
    autoStart: true
    State: started
Now that we have both the package installed and the application pool configured there are a variety of folder permissions outlined above that we need to configure. All of these can be done using the win_acl module. Add the following steps to your chocolatey_server/tasks/main.yml:
 - name: Grant read permissions to c:\tools\chocolatey.server
  win_acl:
    user: ""
    path: c:\tools\chocolatey.server
    rights: Read
    state: present
    type: allow
    inherit: ContainerInherit, ObjectInherit
    progagation: InheritOnly
  with_items:
    - IIS_IUSRS
    - IUSR
    - IIS APPPOOL\ChocolateyServer

- name: Grant IIS APPPOOL\ modify permissions to c:\tools\chocolatey.server\App_Data
  win_acl:
    user: ""
    path: c:\tools\chocolatey.server
    rights: Modify
    state: present
    type: allow
    inherit: ContainerInherit, ObjectInherit
    progagation: InheritOnly
  with_items:
    - IIS_IUSRS
    - IIS APPPOOL\ChocolateyServer
This sets up the required permissions to allow Chocolatey.server to accept new packages that we upload using choco push using our API key which we will setup later. Next, we need to make sure that Chocolatey.server has a website setup. We can use the xWebsite Powershell DSC module to complete this task:
- name: Windows | Add Website for Chocolatey.server
  win_dsc:
    resource_name: xWebsite
    Name: ChocolateyServer
    Ensure: present
    BindingInfo:
      Protocol: http
      Port: 80
    ApplicationPool: ChocolateyServer
    PreloadEnabled: true
    ServiceAutoStartEnabled: true
    AuthenticationInfo:
      Anonymous: true
    PhysicalPath: c:\tools\chocolatey.server
This is a fairly straightforward setup, we're setting up a website whose home folder is c:\tools\chocolatey.server (the default install path for Chocolately.server) and binding it to port 80. We've also enabled a few additional settings such as PreloadEnabled and ServiceAutoStartEnabled to make sure this site starts by default. PreloadEnabled will "warm up" our site for us allowing ASP.net to compile pages before our first user visits. To do this IIS will simulate a user request to the default page of the website so that the application initializes. The request is not logged in the IIS logs.
The last thing we should do is customize our chocolatey API key. The API Key will be used when we upload a new package to the server. Add this to our chocolatey_server role:
- name: Set API-Key
  win_lineinfile:
    path: c:\tools\chocolatey.server\web.confi
    regexp: 'add key="apiKey"'
    line: ''
Now, the variable we are using here hasn't been declared yet, we'll do that by adding it to our defaults\main.yml. Create main.yml in the defaults folder and add the following content to it:
---
# defaults file for roles/chocolatey_server
chocolatey_server_api: ChocolateyAPIKey
Feel free to adjust the API key value to one of your own and save the file.
Now we're ready to run the playbook. Rerun our member_server play to install the Chocolately server:
ansible-playbook member_server.yml -i environments/test/hosts
Once complete open your web browser and browse to http://192.168.100.11 and you should see a page similar to this:
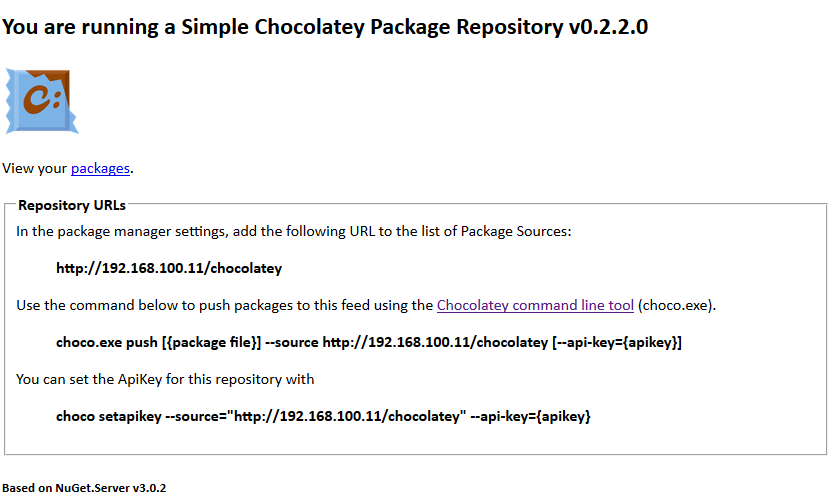
Now we have an internal server we can use to serve up custom packages using Chocolately to our Ansible managed systems.